CNC Kitchen Vibe-Coded a Texture Tool, then Gave It Away for Free
⚓ p3d 📅 2026-04-10 👤 surdeus 👁️ 1

Stefan Hermann, the creator behind the popular CNC Kitchen YouTube channel, wanted a better way to add custom textures to his 3D models. Although fluent in CAD, he found Blender, the software best at redesigning a mesh, too frustrating to learn quickly.
“My mind was trained on parametric CAD, and I find it really hard to get into,” he admits. “I opened it, watched half a UV unwrapping tutorial, got completely lost, and closed it again.”
So Hermann did what any resourceful engineer does these days: he vibe-coded his own solution. The resulting app is called “BumpMesh” and is a surprisingly powerful web-based tool specifically for applying displacement textures to 3D prints.
Go Beyond Fuzzy Skin
Adding textures to your 3D print isn’t just about the aesthetics. Though it can be useful for hiding seams and layer lines, strategically placed textures can add a grippy surface to things like printed handles. Textures aren’t normally available in CAD software, which leaves engineers who don’t master artistic tools stuck with only one option: adding “fuzzy skin” in the slicer.
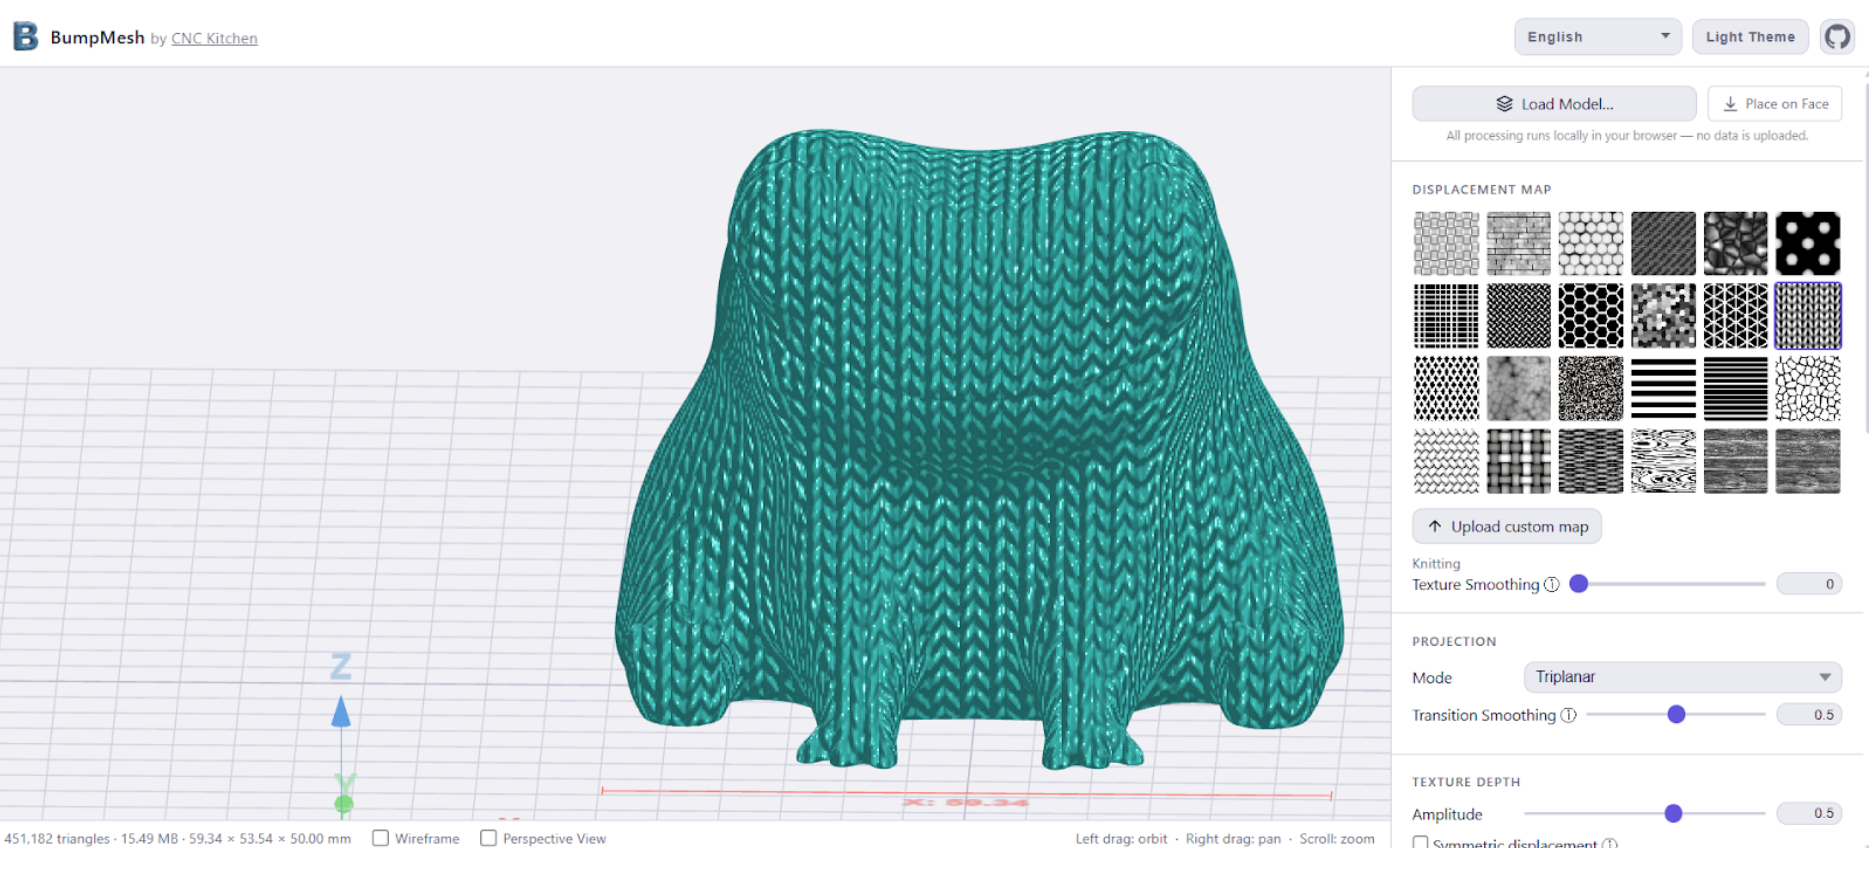
BumpMesh addresses the problem by allowing users to upload any model as an STL, OBJ, or 3MF file, then apply textures derived from grayscale images. The tool offers several patterns to start, plus you can upload your own custom textures.
We Tested BumpMesh
I uploaded a simple frog model from Thingiverse to BumpMesh. I wanted to dress him in a sweater, but I wanted something different from the default knit pattern.
Creating a custom texture only requires a tiny bit of graphic arts skill. I used a screen grab of a sweater pulled from a shopping site, cropped in tight on a few inches of the pattern, then removed the color and made it high contrast. This pattern looked good on the screen, but after printing out on a Bambu Lab H2D using a .16 layer height, the results were blurred and indistinct.
I was able to solve this by converting the image to a line drawing, which I touched up in Photoshop. This second frog had a much crisper faux sweater.
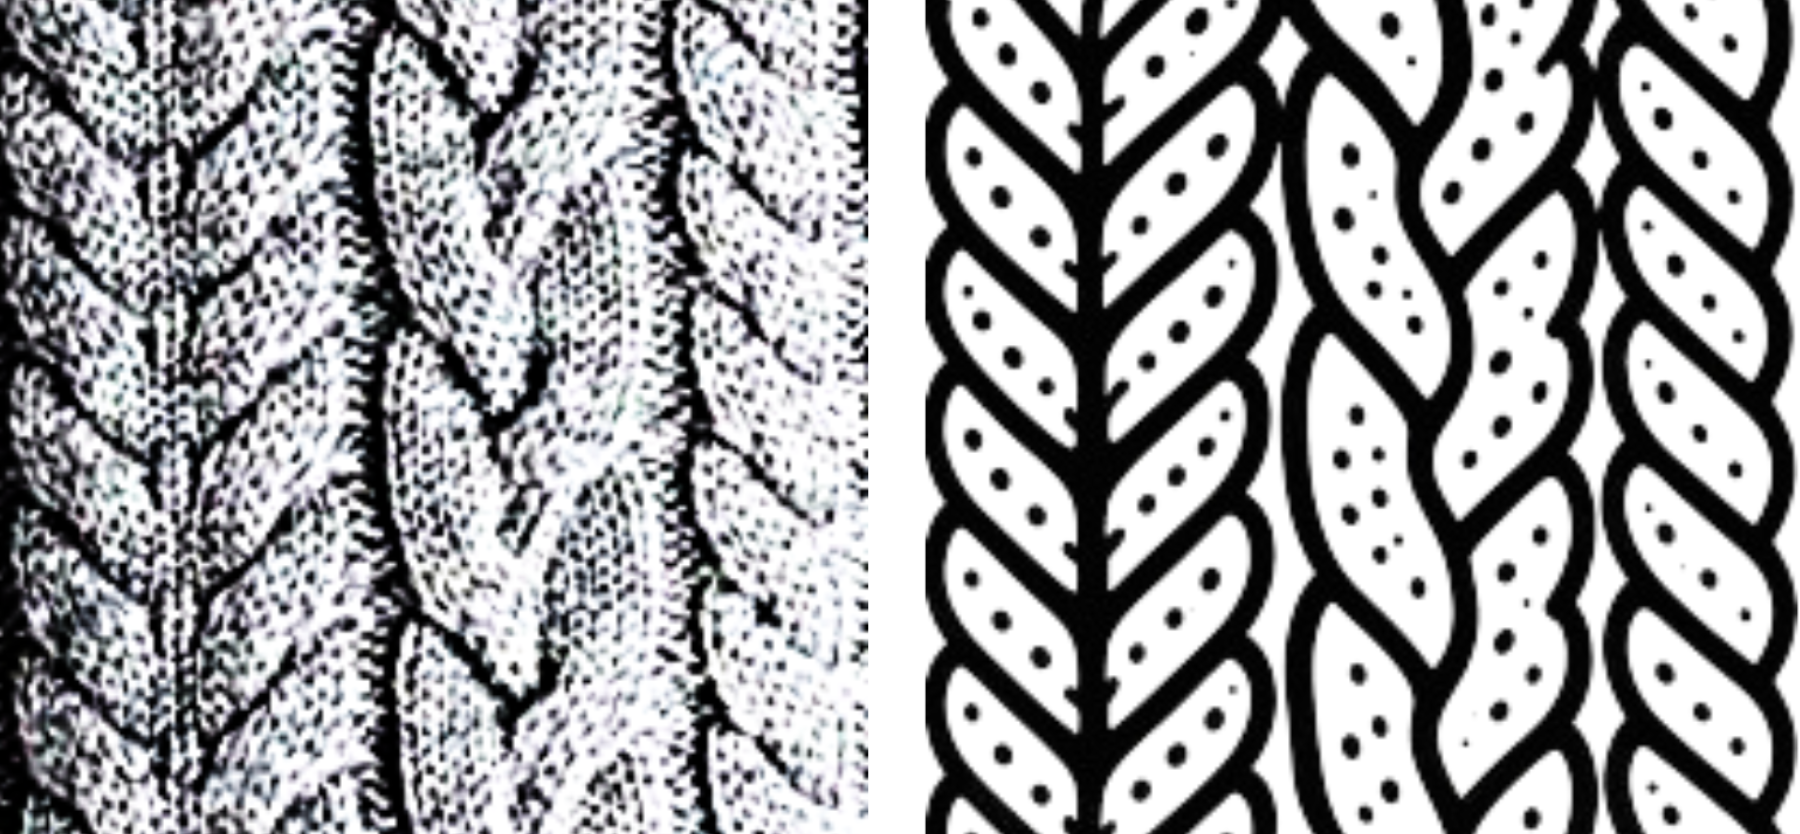
Line drawings are better for creating new textures.
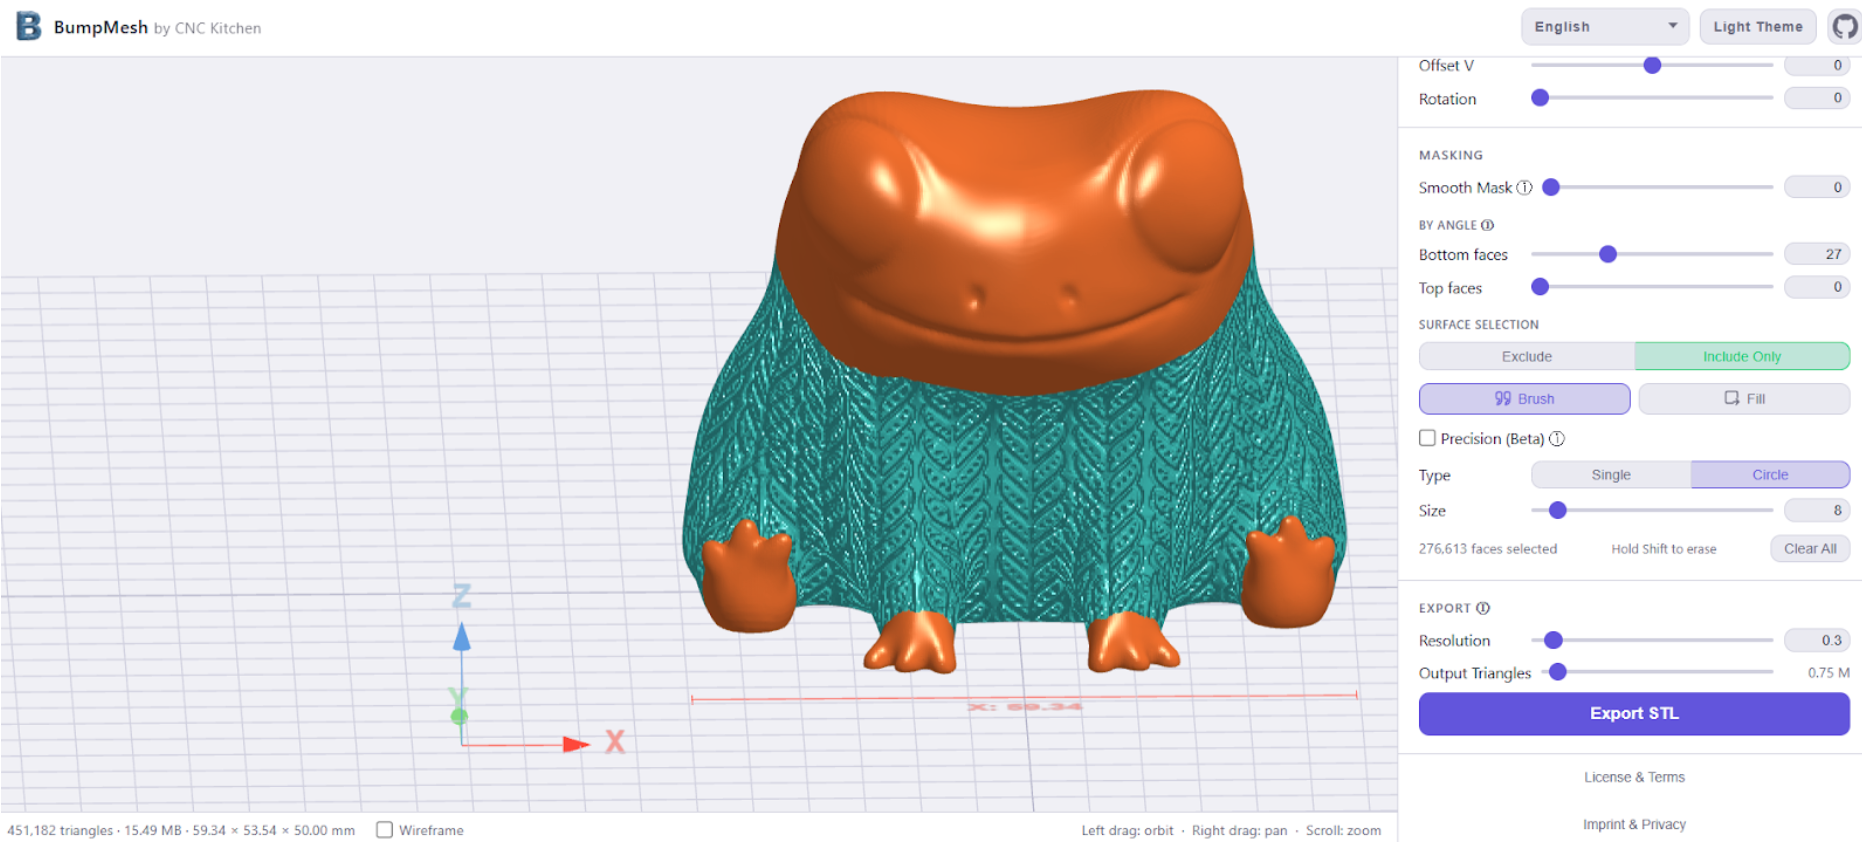
The tool allowed me to paint the new knit texture onto Fred the frog, freeing his head and feet from the pattern to create a faux sweater. The paint tools are rudimentary, but pretty good considering this was coded in a week with AI.
BumpMesh gives the user sliders to scale the pattern, rotate it, smooth it, change the projection mode, and adjust the texture’s depth. Want the texture to go inward or outward? A quick toggle for “symmetric displacement” handles that. The app gives real time feedback to assess your results.
BumpMesh offers several powerful features that set it apart from simple slicer tools:
- Multiple Projection Modes: Whether you’re texturing a cube (Triplanar), a bottle (Cylindrical), or a flat surface (Planar), BumpMesh ensures the texture wraps accurately around your geometry.
- Angle Masking: Automatically prevents textures from being applied to surfaces at a specific angle, which is crucial for maintaining a flat bottom face for better print bed adhesion or for ensuring shallow overhangs print cleanly.
- Surface Masking (Paint-on): This is where BumpMesh truly shines. You can use a digital brush or bucket fill tool to precisely select areas you want to texture—or, even more powerful, areas you want to exclude (like the handle area of a microphone while leaving the top clear).
Vibe Coding a Solution
Vibe coding has become a popular way for novice programmers to fill in their knowledge gap with an AI assistant to create programming quickly. As Stefan explains, “Even though I can code reasonably well, building something like BumpMesh would have taken weeks of work at my own skill level…Vibe coding simply gives me the ability to go from an idea to a working custom solution in only a few hours.” He estimated it took only about a week of his time and $20 in subscription fees to Copilot.
Privacy and Accessibility
The core philosophy behind BumpMesh is simplicity and accessibility. It’s completely free, open-source, and best of all, runs locally in your web browser. There are no accounts to create, no license fees, and no tracking. Your files are processed right on your own computer, ensuring your designs stay yours.
Still a Work in Progress
While Hermann is realistic that the tool “isn’t perfect yet”, currently requiring multiple passes to apply multiple textures and having some limitations with extremely complex geometry, it’s an incredible start, especially considering it was developed in just a week. He’s already actively encouraging feedback and feature requests through platforms like Printables, Maker World, and GitHub.
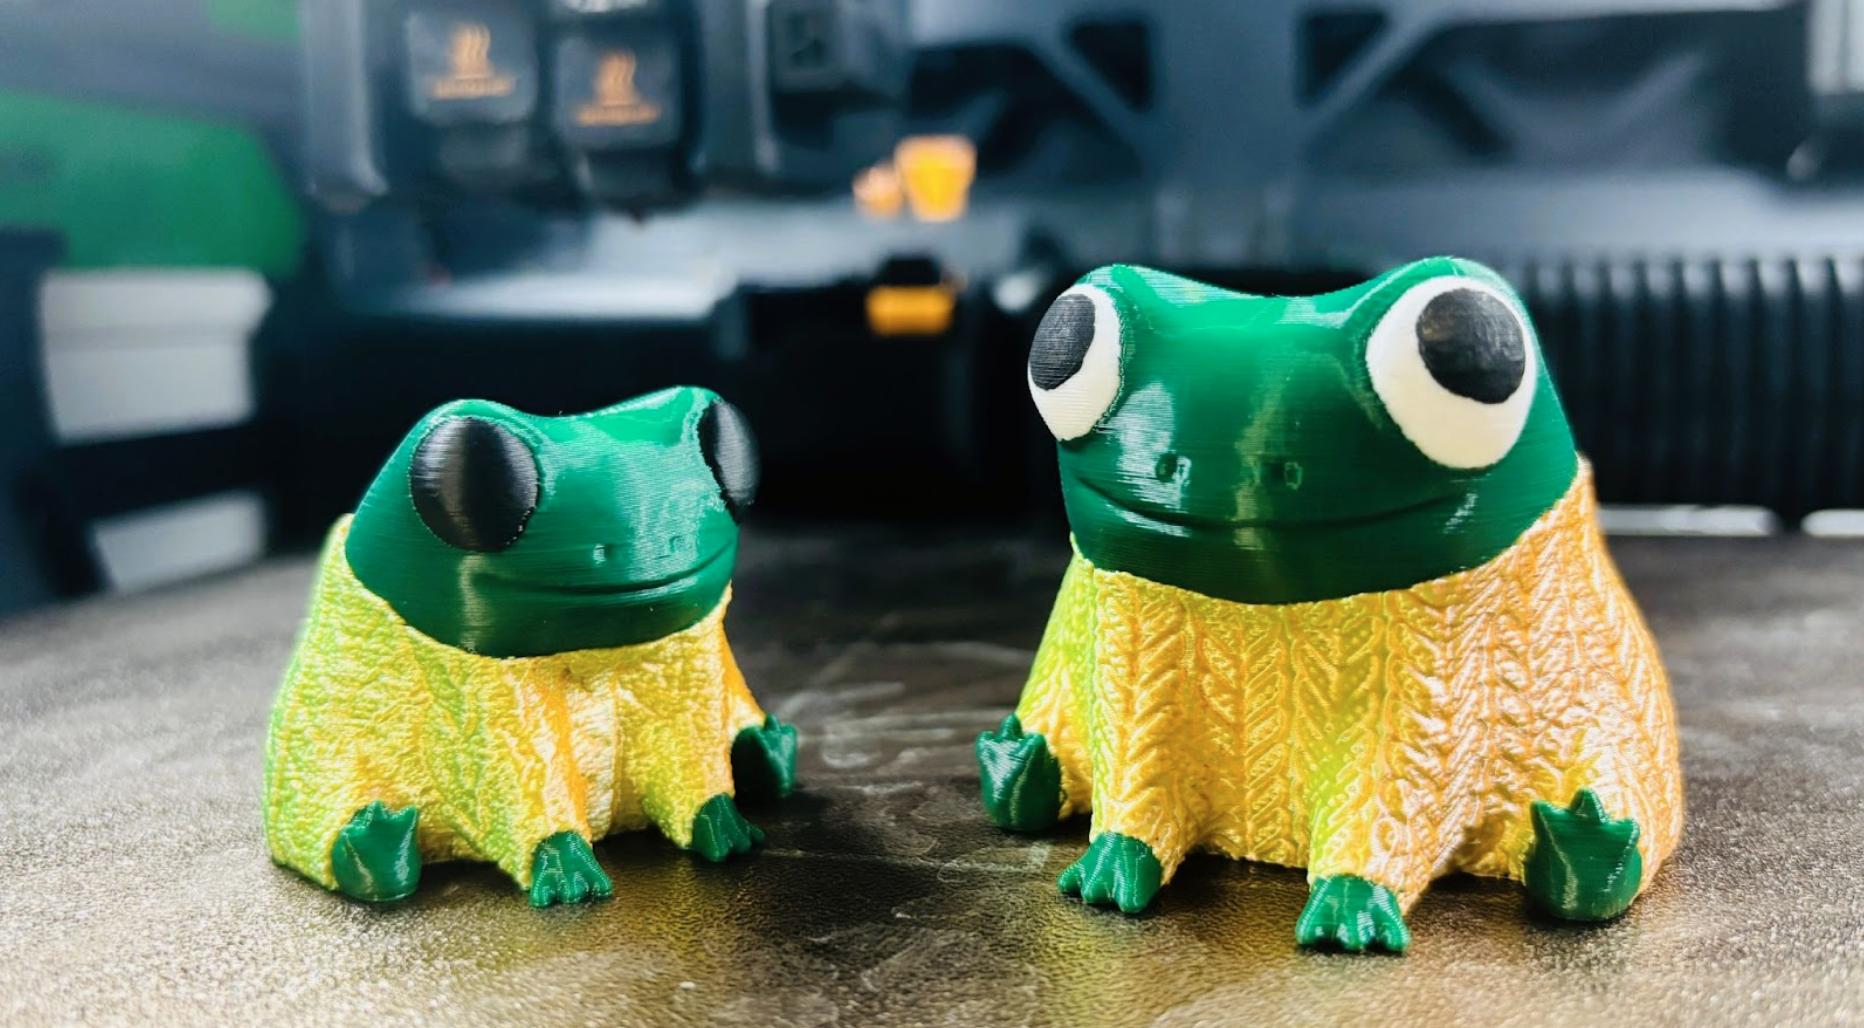
Fred the Frog with texture. Image courtesy of Denise Bertacchi.